A Contiki port for my custom cc2520+stm32f4-boards

Previously, I have designed a small circuit board with a cc2520 rf-tranceiver and a stm32f4 microcontroller (see this post). After porting the driver for the cc2520 to ChibiOS for a few tests, I decided to port Contiki to support this platform as well. As this is the first time that I work with Contiki, uipv6 and 6LoWPAN, this was quite a challenge for me. Nevertheless, I managed to make the following features work:

  • The cc2520 radio
  • The RPL border router using the USB connector
  • RIME
  • IPv6
  • LEDs
  • printf for debugging
  • Many applications, such as the webserver, telnet, udp
  • I made a driver for ws2811 LEDs that uses DMA and a timer

In this post, I will describe what the essential steps were to port Contiki to this board and how to use my port. I have uploaded the Contiki port together with a few example applications to github. You can download it here.

Continue reading

CC2520 and STM32 RF boards

I have made a small PCB with an STM32F4 microcontroller and a TI CC2520 radio transceiver. There are many mote modules available already, but I wanted one optimized for performance as opposed to power consumption. I also wanted to try making a PCB with some RF-parts since I haven’t done that before.

These are the 2-layer PCBs ordered from OSHPark:

RF_All

Continue reading

Debugging the STM32F4 using openocd, gdb and Eclipse

About

This article will describe how to debug the STM32F4 microcontroller using the zylin eclipse plugin. The following setup will be used:

  • STM32F4 discovery board
  • The built-in SWD programmer/debugger on the discovery board
  • Toolchain and example program from this tutorial (I have updated the build script for debugging to work, so if you have followed the tutorial before you may have to download and run the summon-arm script again)

The result will look something like this:

Debug_View

You can:

  • Set hardware breakpoints
  • See variable values when hitting the breakpoints
  • Change variables, then continue
  • Many other things…

Continue reading

STM32F4 Discovery USB host and MP3 player

I have not written any new post for a while, so here is one more project for the stm32f4 discovery. I prepared this post a long time ago, but for some reason I never posted it, so here goes:

STM32F4_MP3

Based on one of the examples provided by ST, I have written a program for the STM32F4 Discovery board that plays MP3 files from an USB memory stick. You can download it here.

If you use a usb-host cable such as this one you can connect an USB memory stick (with fat32 file system) with mp3-files to the micro-usb port of the stm32f4 discovery. The files should then be played one by one. The user button can be used to skip to the next file.

If you follow this tutorial you should be able to build and upload the provided files right away.

The main.c-file has many comments, so hopefully you can figure out how it works. Using a USB-memorystick for logging is quite easy with this program as a basis. Only the two usb-pins, 5V and gnd are required to connect it to any stm32 with USB support, so hw-wise it’s even easier than using an SD-card.

USB-Serial on STM32F4

About

Based on this, I have written a small program for the STM32F4 Discovery that uses the USB-CDC class to show up as an virtual serial port. I’m using the USB stack provided by ST, however, there is also another project that uses libopencm3 that can be found here. I have routed the write system call to use this port, so the stdio printf function will print directly to this serial port.

How to use it

If you don’t have the necessary toolchain to build and upload programs to the STM32F4, you can have a look at this post. Otherwise, the following steps should be sufficient:

  1. Download the source code complete with all libraries and makefiles here.
  2. Unpack the program and run make from its root directory. The binary file that can be uploaded should appear in the build directory.
  3. Upload the program to the STM32F4 discovery (again, this post explains how) and plug in a micro-USB cable to the port next to the audio jack.
  4. The serial port should show up as /dev/ttyACM0 on most GNU/Linux distributions, such as Ubuntu.
  5. Start a serial port terminal, such as gtkterm (sudo apt-get install gtkterm on Debian/Ubuntu), and open ttyACM0. The baudrate does not matter as it currently is ignored by the program (see usbd_cdc_vcp.c).

The current program runs some floating point operations and prints the elapsed time on the USB-CDC serial port. The float parameters in the makefile can be changed to see how the FPU affects the speed (and there is a lot of difference). Remember to run clean after changing the float parameters, as the object files are not compatible between hardfloat and softfloat builds.

Play MP3 on the STM32F4 Discovery

Update: I also have a project that plays mp3 from an USB memory stick with a fat32 file system here.

About

I have written a simple program for the STM32F4 Discovery board that plays a short mp3 file from flash memory. For the decoding, the fixed point version of the Helix mp3 decoder is used. The audio output driver is the one used for the Peridiummmm demo, modified to use the peripheral library provided by ST.

The audio driver has two DMA buffers and a callback function that asks a user-provided function to fill one buffer with audio data when it runs out, while the other DMA buffer is streamed to the audio CODEC. This user function decodes one MP3 frame and forwards the raw audio samples to the audio driver. As this is interrupt driven, the main function can still be used for other things.

How to build and use it

If you don’t have the necessary toolchain to build and upload programs to the STM32F4, you can have a look at this post. Otherwise, the following steps should be enough to test it:

  1. Download the complete source code and makefiles here.
  2. Unpack the program and run make from its root directory. The binary file that can be uploaded should appear in the build directory.
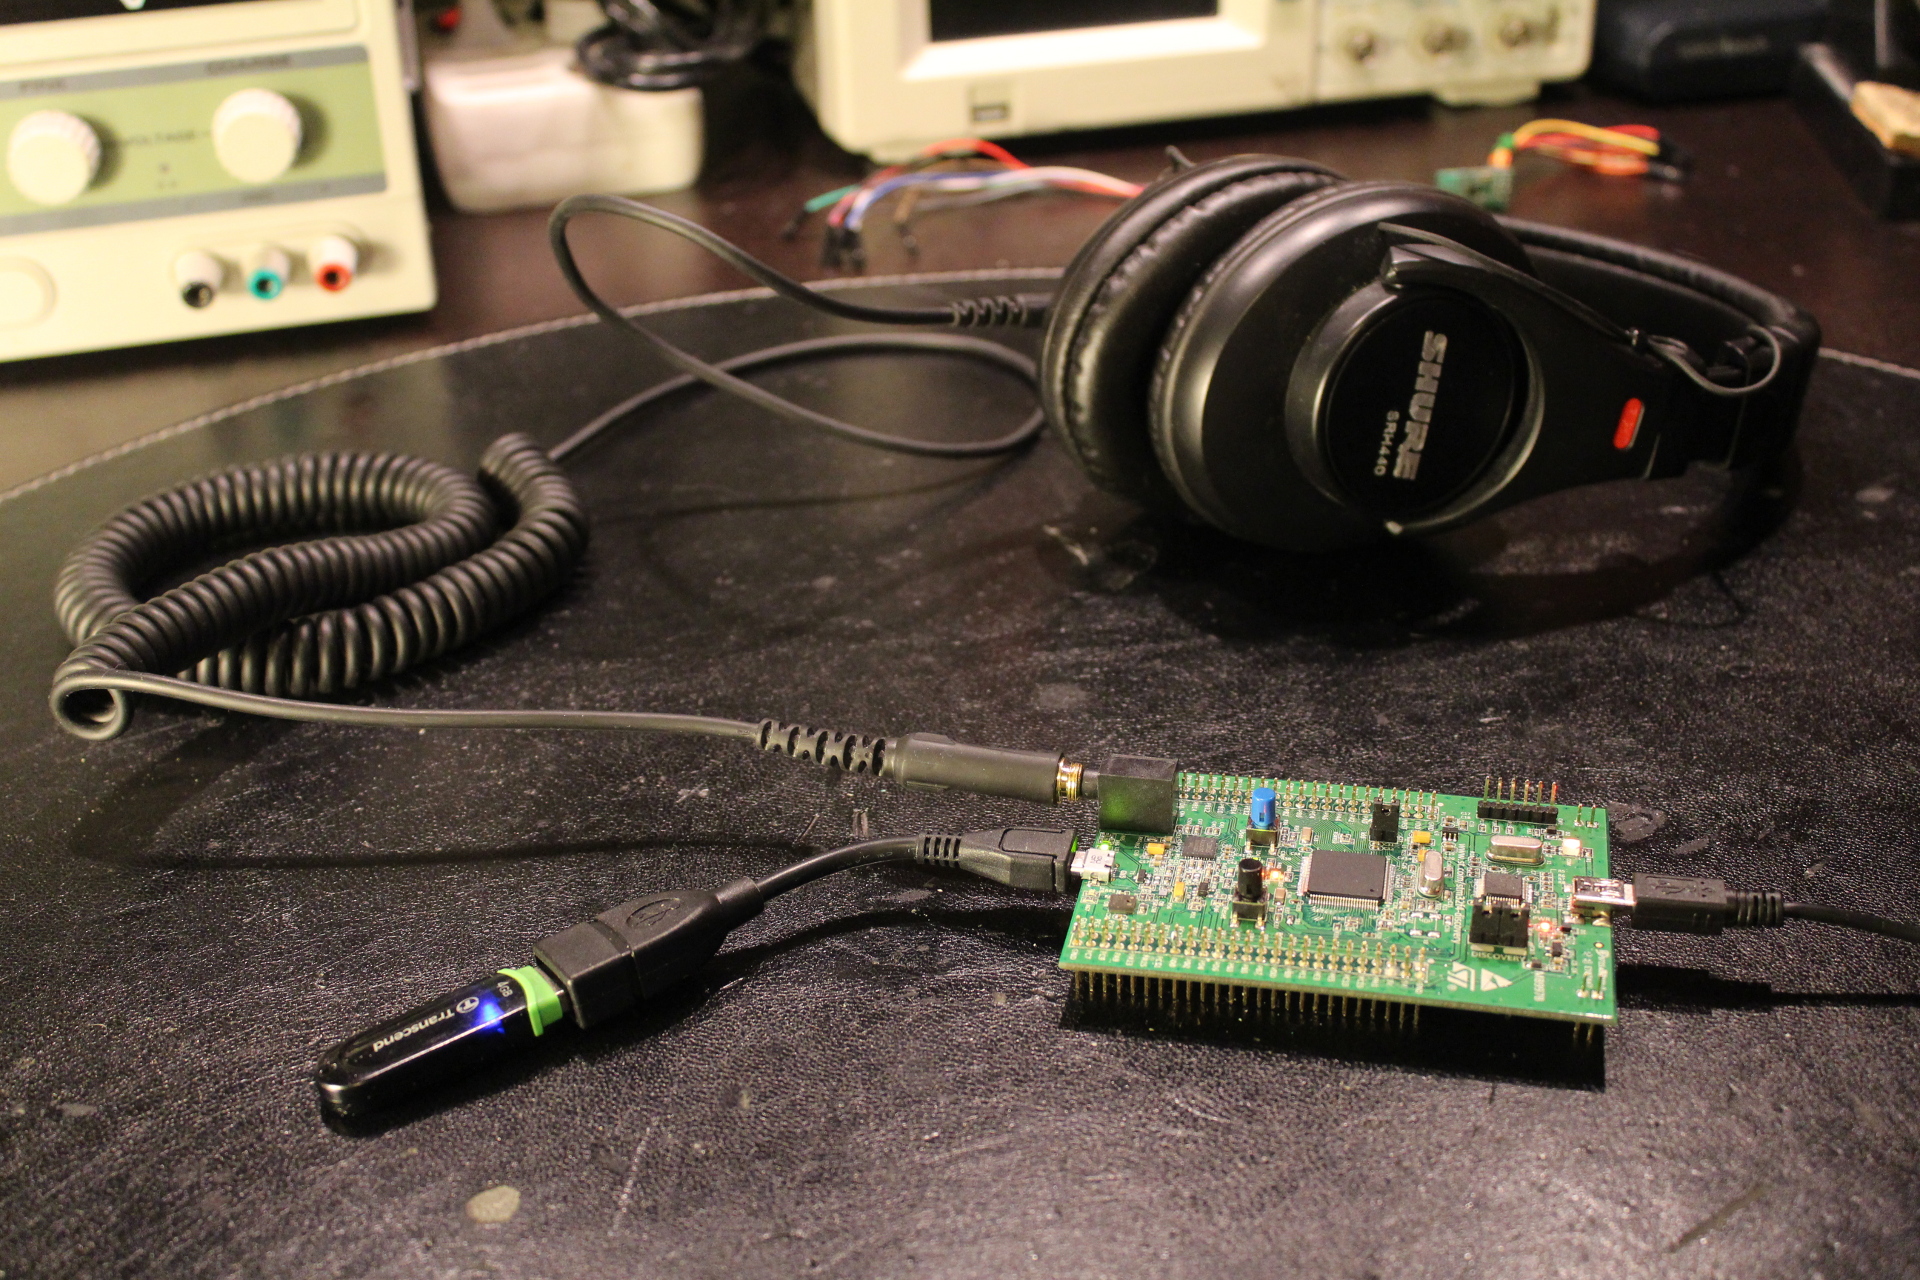
  3. Upload the program to the STM32F4 discovery (again, this post explains how) and plug in headphones or speakers to the audio jack.
  4. You should hear some music! You can change the volume between two discrete steps by pressing the user button on the discovery board.

That’s it! It should be quite easy to modify the code to play mp3s from, for instance, an external SD card.

Use your own MP3 file

The the mp3_data[] in src/mp3_data.c is just the raw data of a normal mp3 file. I used this perl script to convert the mp3 file to a c array. After you unzip the perl script, you can use it like this:

chmod +x bin2hex
./bin2hex MP3FILE.mp3 1 > mp3_data.c

Where MP3FILE.mp3 should be replaced with the mp3 file you want to convert.

Remember that the mp3 file has to be small enough to fit on flash memory of the STM32F4. You can use Audacity to trim/re-encode mp3 files. You should also clear the ID3 tag if possible, as this saves space. As it is now, stereo files with 44.1 KHz sample rate (and any bitrate, even VBR) can be played. When the number of channels or the sample rate differs, the playback speed will become incorrect. This can of course be fixed easily, but I wanted to keep this example as simple as possible.

On Ubuntu, you can install audacity with:

sudo apt-get install audacity

Get started with the STM32F4 on Ubuntu Linux

Updated 2014-04-03

Introduction

This tutorial describes how to set up a complete and free toolchain for STM32F4xx microcontrollers, including how to use hardware floating point support. It is mostly aimed towards beginners with ARM microcontrollers, however, experienced developers could probably find something useful here as well. It is assumed that the reader is a bit familiar with the C programming language and the Bash terminal.

At the end of this tutorial, the reader should be able to build and upload programs to the STM32F4** using the STLinkV2 interface (such as the one found on the STM32F4 Discovery board). This is done using Ubuntu Linux in this tutorial, however, the instructions should be general enough to make this work on any Debian-based GNU/Linux distribution.

The following hardware/software will be used:

Continue reading

Access IEEE papers via Chalmers from home

If you are studying at Chalmers University of Technology you can download IEEE papers for free, but that only works if you are connected to the network at the university. One way to work around this and access them from home is to use an SSH tunnel, and I’m going to explain how to do this from Linux. This is tested on Ubuntu 12.04, but it should work the same way from any distribution if OpenSSH is installed, which it usually is by default.

Continue reading

Testing a simple sumo program using 3 proximity sensors

During RobotChallenge Sleipner was using 7 proximity sensors, but this did not work very well. The reason for that is that the sensors had 140cm ± 3% range almost regardless of the surface of the object. Most things were closer than that to the dohyo, so most of the matches were quite random.

The tests in the video below are done with only 3 sensors, but no objects are closer to the dohyo than 150cm. As it turns out this is quite enough even with a simple program. One problem is that the sensors are a bit slow, so while the robots turns at high speed small objects such as the can won’t trigger the sensors. Otherwise, the robot should abort the rotation and attack.

Considerations for the next robot

Sensors are among the biggest challenges when building sumo robots. Good sensors are really expensive and… not that good. My plan is to hopefully get some 200+ fps camera sensor and use an FPGA to approximate the position of the other robot. I’m quite familiar with Xilinx FPGAs and VHLD but I have only seen pretty slow camera sensors with a documented interface and an affordable price.

In general I would like to build the robot without spending too much money on it. Firstly because I’m a student and can’t afford too much (not considering sponsors) and secondly because I like the idea of building a great sumo robot without spending 800€ on maxon motors and lots on expensive industrial sensors. The motors I’m using now are normal BLDC RC car motors for 20€ each and I made custom motor controllers myself. The power output is much higher than for maxon DC motors with similar size. The outrunner BLDC motors I’m going to use for the next robot are even cheaper and have twice as high power output and lower RPM compared to the ones I currently use, so they are perfect for this. As the motors are brushless with sensors and I control the commutation myself they are also used as tachometers with 120 pulses per revolution per wheel, giving me an approximation of the current position on the dohyo. This is also used when turning around at the edge; the turn is not decided by a delay like most other robots, but by the angle difference reported from the motor sensors. Combining this with an all-seeing FPGA-based sensor should result in a really powerful sumo robot.

[CRF]Sleipner upgraded for RobotSM 2012

RobotChallenge in Vienna

Me and Vilse from CRF spent about three weeks before RobotChallenge building this robot (the robot is called Sleipner and is an autonomous 3kg sumo robot). As we had other thing going on, such as our usual studies at Chalmers, this was done quite in a rush. The first time we tested the robot autonomously was a few hours before the first matches.

Issues with the design

The competition didn’t go as well as planned. The biggest problems were that the magnets were too far away from the ground and that the blade was really weak. The robots with the better blades always picked up Sleipner in front collisions. Some of them had blades made from really sharp knives. The blade on Sleipner was a 1mm thick sheet of spring steel. Recently I made a few attempts at fixing a few of those issues.

The improvements

Firstly, I milled a new base plate for Sleipner. As the wheels are adjustable in height this allowed the magnets to be placed less than 1mm from the ground. Also, they could be distributed in a way to get a better centre of gravity (or, centre of magnet force in this case). The benefits of this action can clearly be seen in the video below.

The next major improvement was the new blade. I bought a couple of knives for a thickness planer made from HS-steel. This was not tested against another robot, but it is most likely a major improvement.

Watch the video for more details

The next 3kg sumo robot

This robot really has enough power with the BLDC motors, but it would be nice to have motors with lower RPM to avoid the gear boxes and gain 400 (the weight limit is 3kg) grams for more magnets. Brushless outrunner motors are perfect RPM-wise, but they have a major drawback: they are always sensorless. This means that they have to be run in open loop at low RPM and thus have very low torque before they speed up. This is no problem for air planes, but for sumo robots that change direction all the time it is completely useless.

I bought a couple of these outrunner motors and managed to mount hall-effect sensors in them. This works really well and gives the motors great torque at the start. In addition, they are also more powerful than other motors in similar size. The ones I modified are 192 grams heavy and are rated 1000 watts each. Also, the KV (RPM per volt) is perfect to run the motor with a small gear against the gears currently mounted on the wheels, which saves 400 grams in total for the gearboxes on the robot. I will write a bit more about this motor modification in another post soon.