Many people have asked me how to communicate with the VESC using UART, but I did not have a good answer since I haven’t written any tutorial about that and the only thing I could refer to was the BLDC Tool code. Now I have created a project for the STM32F4 discovery board that implements UART communication with the VESC where the full interface is implemented. In this post I will try to explain how the code works and how to port it to other platforms.
VESC – Writing Custom Applications
Updated: 2016-01-22
The VESC has several extra ports and much extra computational power, so it can be used to run custom user code in addition to controlling a motor. This is convenient when there are space constraints and it is also the best way to implement real-time control applications where timing is critical. The code of the VESC is organized in such a way that it is easy to write and maintain custom applications while keeping the code up to date without having many conflicts when pulling updates using git. In this tutorial I will demonstrate how to make a custom application that will run a motor using speed control while a button is held with a speed proportional to the voltage on the ADC_EXT pin.
VESC – Open Source ESC
Post updated 2016-01-22
About this project
I have made many updates to my custom motor controller recently and the old post is getting confusing with notes and updates, I decided to write a new post about it that hopefully is more clear, more complete and easier to follow. This might sound a bit ambitions, but my goal is to make the best ESC available. I really enjoy sharing knowledge, so I want to keep all the hardware and software open.
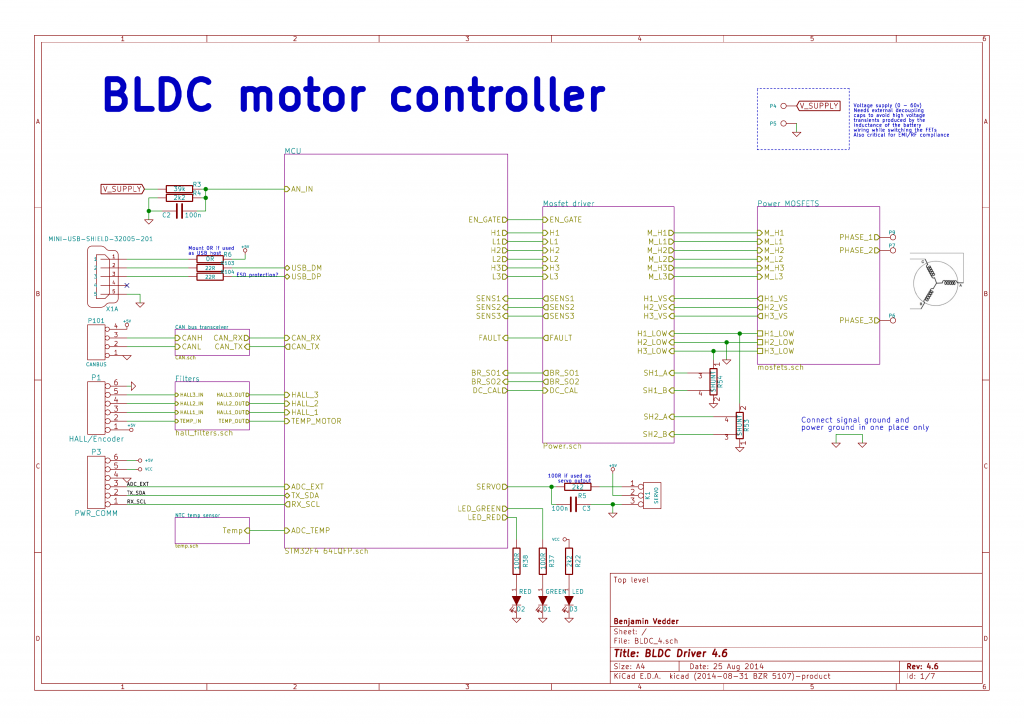
This is an overview of the schematic (download a complete PDF here):
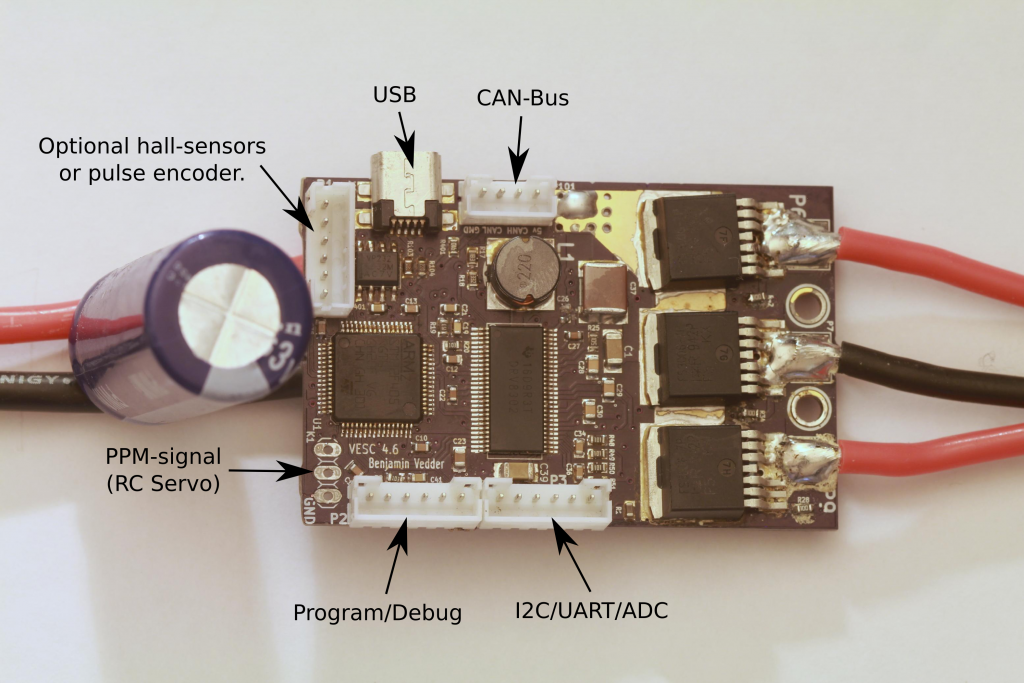
This is the front of the PCB:
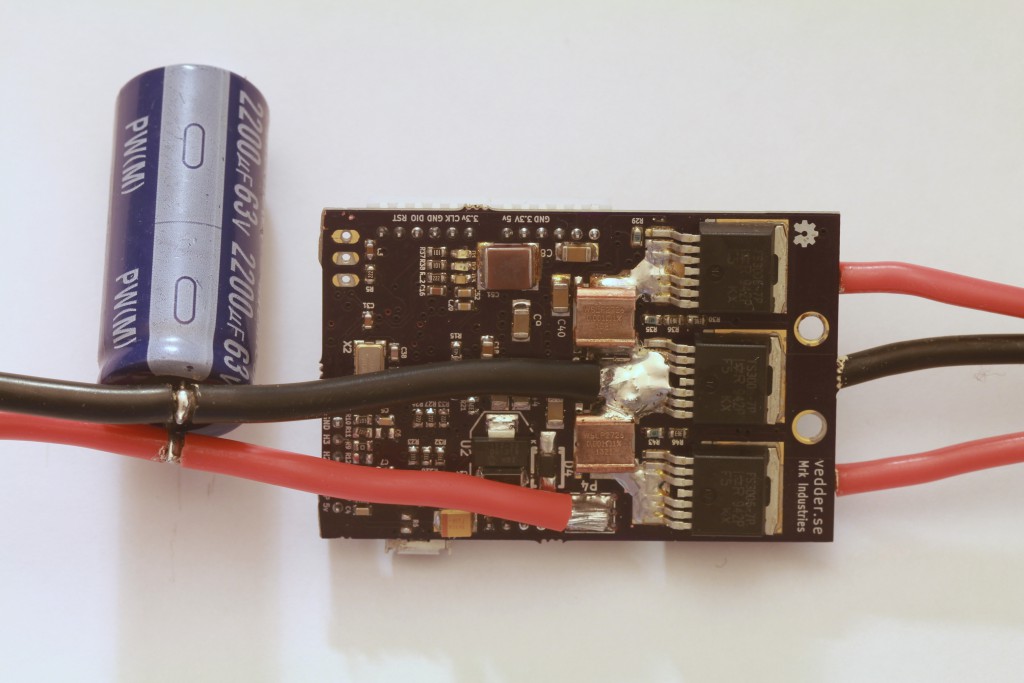
The back:
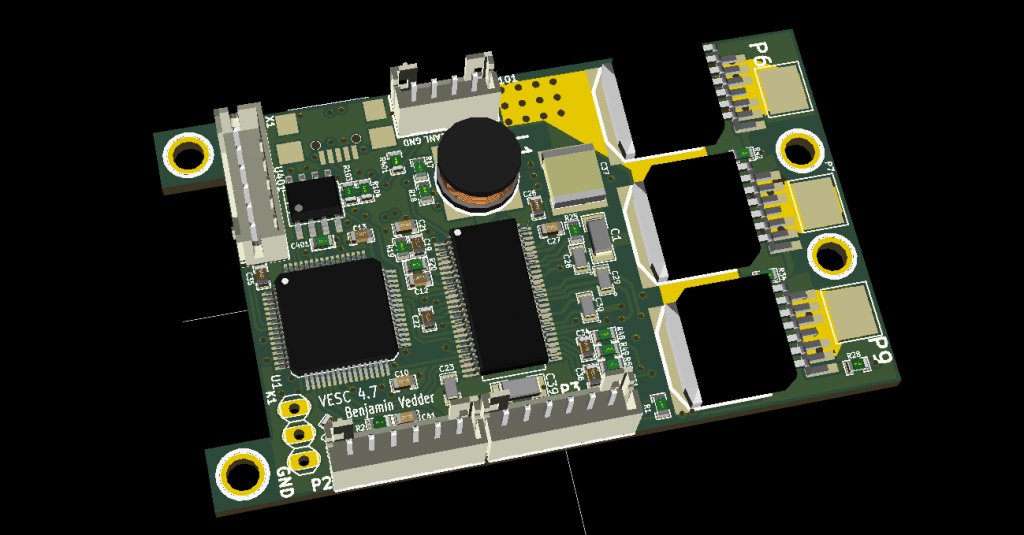
3D render from KiCad:
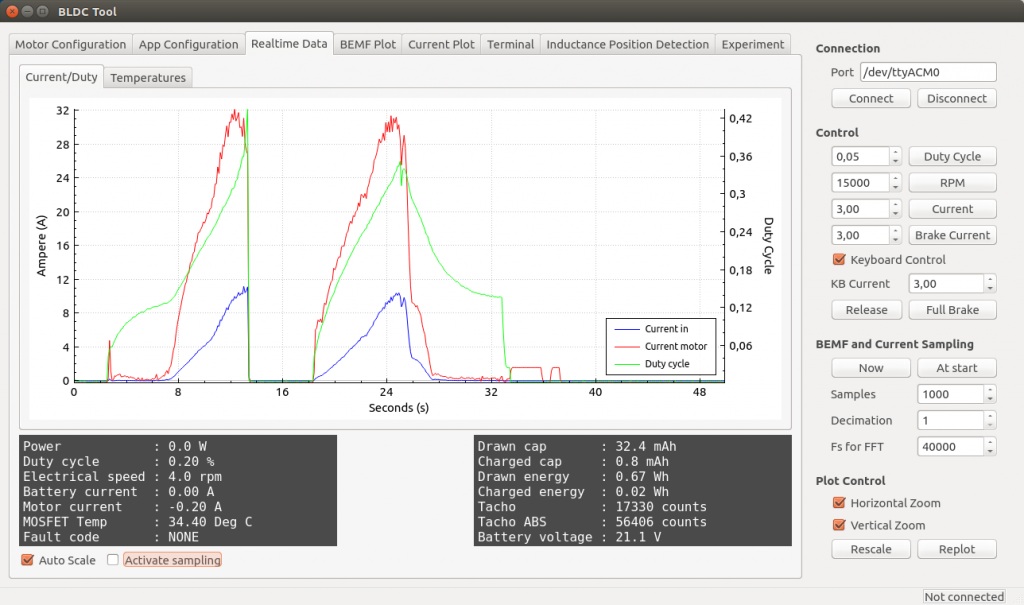
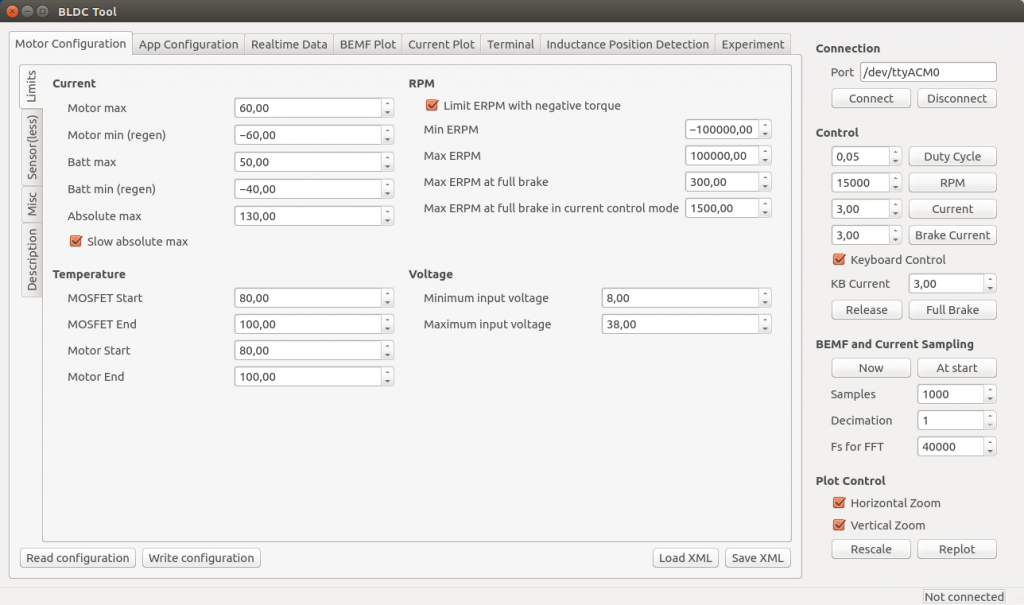
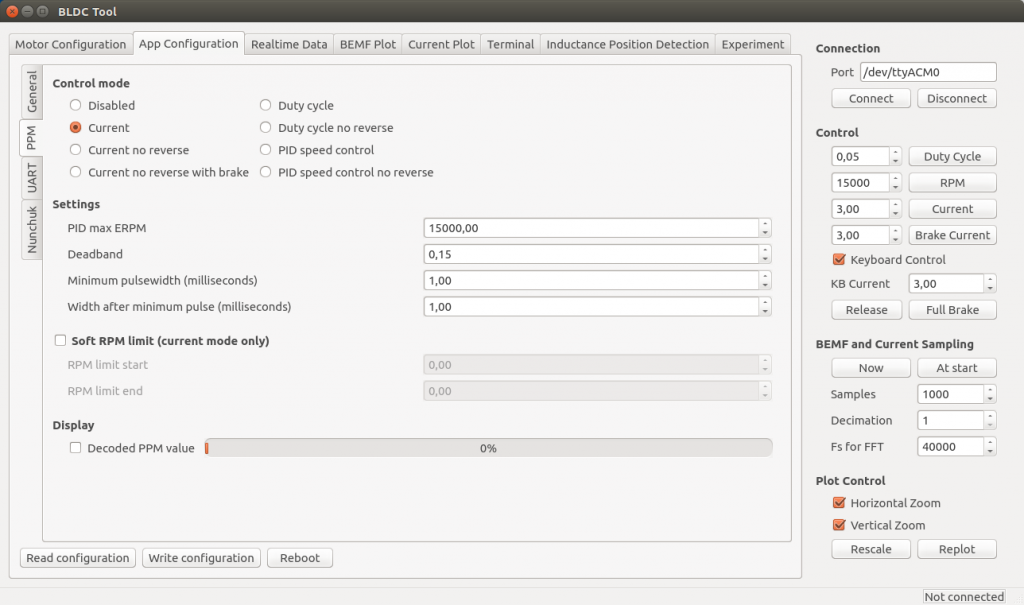
Some screenshots of the configuration GUI (BLDC Tool):
Resources
All files are on github to keep them up to date, so check these links on a regular basis:
- Hardware design
- Bill of materials
- Firmware
- Configuration GUI
- Video logger
- osx and windows builds of BLDC Tool, Video logger etc. by Jacob Bloy
Related posts
- Old post motor controller (just for reference)
- Video overlay logging
- Electric skateboard motor tutorial (KV, cells, etc.)
- Startup torque
- Hardware debugging
- Making a programmer
- Writing custom applications
- UART Communication
Forums
Because information about the VESC is scattered all over the internet and a lot of information is in email conversations with me, I have created a forum dedicated to the VESC here.
Live Chat
I have created an IRC channel on freenode where you can live chat with me and other users about VESC and my other projects. Feel free to join: http://webchat.freenode.net/?channels=vedder
Features
- The hardware and software is open source. Since there are plenty of CPU-resources left, the customization possibilities are almost endless.
- STM32F4 microcontroller.
- DRV8302 MOSFET driver / buck converter / current shunt amplifier.
- IRFS7530 MOEFETs (other FETs in the same package also fit).
- 5V 1A output for external electronics from the buck converter integrated on the DRV8302.
- Voltage: 8V – 60V (Safe for 3S to 12S LiPo).
- Current: Up to 240A for a couple of seconds or about 50A continuous depending on the temperature and air circulation around the PCB.
- Sensored and sensorless FOC wich auto-detection of all motor parameters is implemented since FW 2.3.
- Firmware based on ChibiOS/RT.
- PCB size: slightly less than 40mm x 60mm.
- Current and voltage measurement on all phases.
- Regenerative braking.
- DC motors are also supported.
- Sensored or sensorless operation.
- A GUI with lots of configuration parameters
- Adaptive PWM frequency to get as good ADC measurements as possible.
- RPM-based phase advance (or timing/field weakening).
- Good start-up torque in the sensorless mode (and obviously in the sensored mode as well).
- The motor is used as a tachometer, which is good for odometry on modified RC cars.
- Duty-cycle control, speed control or current control.
- Seamless 4-quadrant operation.
- Interface to control the motor: PPM signal (RC servo), analog, UART, I2C, USB or CAN-bus.
- Wireless wii nunchuk (Nyko Kama) control through the I2C port. This is convenient for electric skateboards.
- Consumed and regenerated amp-hour and watt-hour counting.
- Optional PPM signal output. Useful when e.g. controlling an RC car from a raspberry pi or an android device.
- The USB port uses the modem profile, so an Android device can be connected to the motor controller without rooting. Because of the servo output, the odometry and the extra ADC inputs (that can be used for sensors), this is perfect for modifying an RC car to be controlled from Android (or raspberry pi).
- Adjustable protection against
- Low input voltage
- High input voltage
- High motor current
- High input current
- High regenerative braking current (separate limits for the motor and the input)
- Rapid duty cycle changes (ramping)
- High RPM (separate limits for each direction).
- When the current limits are hit, a soft back-off strategy is used while the motor keeps running. If the current becomes way too high, the motor is switched off completely.
- The RPM limit also has a soft back-off strategy.
- Commutation works perfectly even when the speed of the motor changes rapidly. This is due to the fact that the magnetic flux is integrated after the zero crossing instead of adding a delay based on the previous speed.
- When the motor is rotating while the controller is off, the commutations and the direction are tracked. The duty-cycle to get the same speed is also calculated. This is to get a smooth start when the motor is already spinning.
- All of the hardware is ready for sensorless field-oriented control (FOC).
Writing the software is the remaining part. However, I’m not sure if FOC will have many benefits for low inductance high-speed motors besides running a bit quieter.Sensored and sensorless FOC is fully implemented since FW 2.3.
Connecting a programmer/debugger to my custom STM32 PCBs
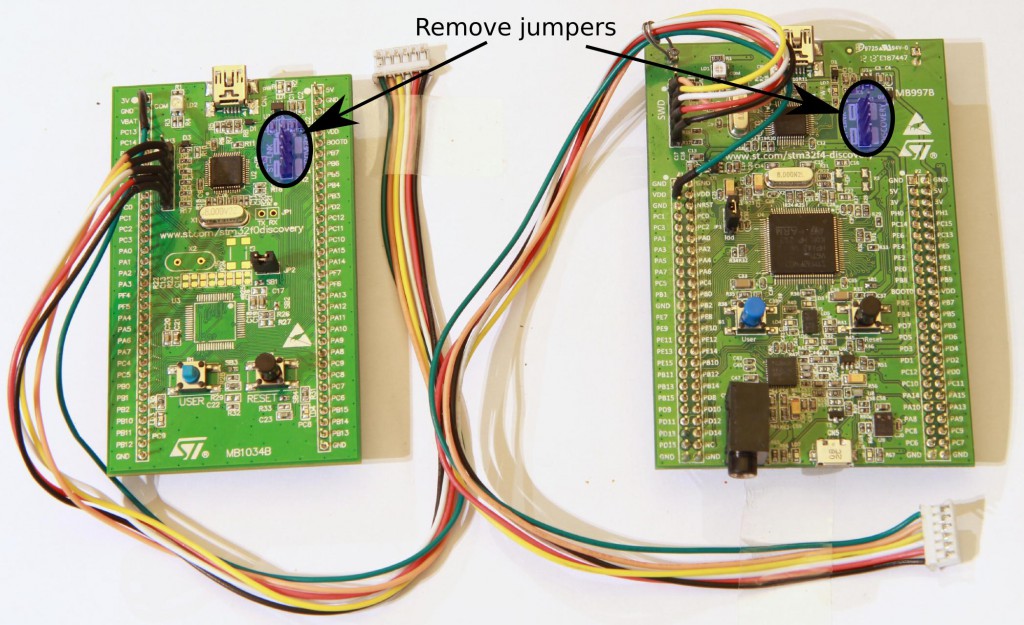
When I make custom STM32 PCBs (such as my RF-mote or my ESC), I use an SWD connector for programming and debugging the microcontroller. The connector is a 6-pin micro-jst connector with 2mm pitch, which easily can be found by searching on ebay. An STM32 discovery board with stlinkv2 works perfectly for programming and debugging, and can be connected as shown here (click on the picture to get a larger version where the wire colors can be seen):
Notice that I have removed two jumpers on the discovery board to disconnect the SWD from the microcontroller. The pins in the jst connector are ordered in the same way as on the discovery board, but the outermost (green) cable is connected to 3V or VDD.
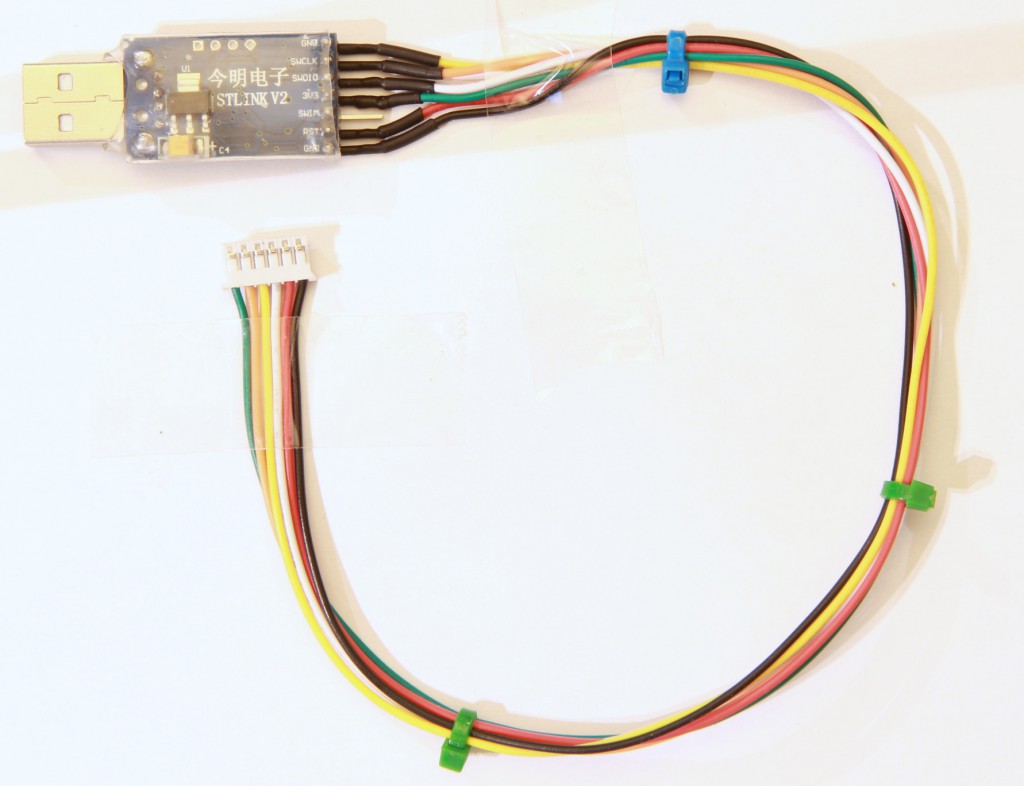
There are also some small and inexpensive stlinkv2 programmers available on ebay (just search for stlink v2), such as this one which I have soldered a micro-jst cable to:
Update:
I had some problems with too long JST cables. If uploading the program does not work for you, try shortening the JST cable.
Open Source ESC Video Logging on Electric Longboard
Chosing the right BLDC motor and battery setup for an electric skateboard
Recently, I have been involved with the electric skateboard community because of my custom ESC. I get many questions about motor kv, gear ratio, current, voltage and efficiency. In this post, I will try to explain how things are connected and how to chose the right setup. I will try to keep things simple and not involve too many equations to provide a good intuition for the DIY community. The assumption in this post is that we are using an 50mm-60mm hobby outrunner motor.
Startup torque on sensorless BLDC motors
One of the major challenges when working on my custom open source ESC was to get good startup torque and low-speed performance with sensorless motors. This challenge has been addressed in several places around the net:
- Here is one article where Team Novak explain why sensored systems are superior to sensorless systems: http://teamnovak.com/tech_info/view_article/24
- This article about electric scooters has some information about that topic too: http://www.instructables.com/id/The-New-and-Improved-Brushless-Electric-Scooter-Po/step4/Controlling-the-Outrunner-Sensorless-or-Sensored/
- The metroboard has modified motors with hall sensors: http://metro-board.com/brushless-outrunner-motor-testing/
- The marbel electric skateboard also uses hall sensors: http://howtomakeanelectricskateboard.wordpress.com/2014/06/22/marbel-kickstarter/
- Here is a video of an electric longboard with a standard sensorless hobby ESC. There are obvious startup and low-speed issues: http://www.youtube.com/watch?v=SNt70MdUh0Q
Techniques I used
In order to get a smooth and quick startup without sensors I used several tricks, namely:
- There are no hardware low-pass filters that introduce phase delay. Such filters can be avoided because the ADC samples are synchronized to the PWM timer and adjusted dynamically every time the duty cycle or switching frequency is changed.
- After a zero crossing, the area under the voltage is integrated until a threshold for commutation based on the motor parameters. This integration is robust agaist acceleration and provides good SNR since an integrator is a low-pass filter.
- There is a parameter that defines the voltage coupling between the windings when measuring the back-emf. This make a huge difference when running at low speeds with low duty cycle. This compensation has a RPM dependence though, which is something I tried to avoid where possible because the RPM estimation has a delay and thus causes problems during acceleration.
- To get better voltage samples, the switching frequency is adaptive and proportional to the duty cycle. This is because the back-EMF only can be sampled during the ON-time of the PWM cycle and low duty cycles have short ON time. Since the motor is running slowly on low duty cycles, sampling and switching does not have to be as fast to keep up with the motor which makes this less of a problem. Lower switching frequency also decreases switching losses, which is a positive side-effect.
- When the motor is un-driven, the back-emf on all phases is analysed to track the position, direction and speed of the motor. So when the motor is already spinning, the algorithm will begin in the exact state of the motor (position, duty-cycle, direction).
- I have also used some hack-ish conditions based on trial and error to improve the startup.
- Closed loop operation is used from the first commutation, since the measured values are clean enough when using these techniques.
This is a video where I demonstrate how this works on a scorpion outrunner and an electric longboard:
Some examples with plots
** Note that all the plots show the voltages samples captured by the motor controller, which are synchronized to the PWM timer. It would look different on an oscilloscope since the switching distorts the signal. **
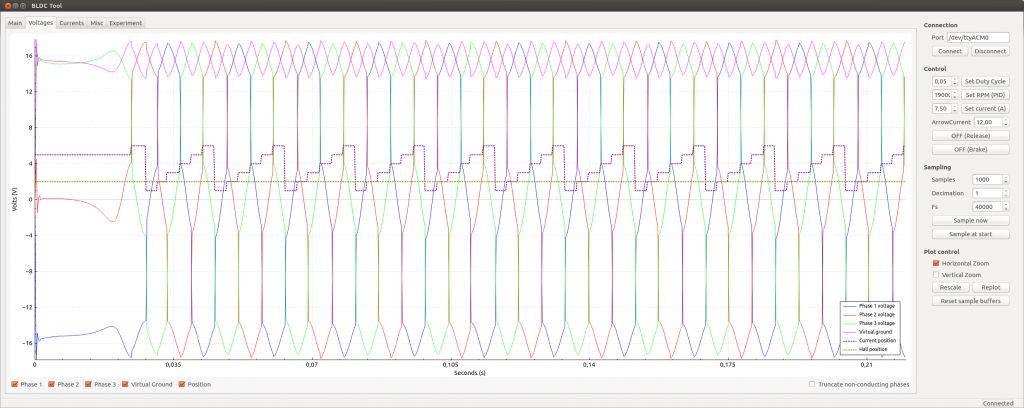
This is what the phase voltage for a typical startup sequence looks like, where the duty cycle is set to 5%:
Even though the duty cycle is only 5%, the waveform is clean. This is because the switching frequency is low at this speed and the on-time is long enough to get good samples. The first commutation is a bit off at first since the motor is not perfectly aligned, but the second commutation already looks perfect.
Testing my custom motor controller
I have been working more on my motor controller recently, and this is a brief update on the progress. One of my test rigs is my 1:8 RC car. With this one, I can test the startup torque, the braking and many of the safety functions, e.g. the transitions and currents when going from full forward to full reverse. Here is a video of the tests:
ChibiOS on my cc2520+stm32f4 boards
I have created a simple example where I use ChibiOS on my rf boards. You can download it here:
In order to build it, you need ChibiOS with the ST libraries in the ext directory, which you can download here:
Update: The ST libraries are no longer required, but you can still use the ChibiOS-version above if you’d like. It should work just as well with the official version.
In this example, there are two threads that send and receive RF packets between two RF boards. If this program is uploaded to two RF boards, the red LED on each board should blink because the other board sends packets to switch it on and off and vice versa. The green LED is on as long as the board receives acks from the other board. Auto-ack can also be switched off – then the green LED should be on all the time.
This example also emulates an USB modem when the USB cable is plugged in, so you can use you favourite serial terminal to connect to it. The baudrate is ignored and does not matter. On Ubuntu, it will show up as something like /dev/ttyACM0 (or 1 or n) depending on whether you have other USB modems.
A custom BLDC motor controller (a custom ESC)
================= IMPORTANT UPDATE =================
I have written a new post about my open ESC on this page and also updated the hardware significantly. If you haven’t built it yet and if you are planning to order parts for it, please refer to that page. I will only leave this page for reference in case you have built it before I wrote the new post and updated the hardware. Also, If you have built the ESC before, the tutorial and software on the new page also applies to the old hardware.
=====================================================
Updated 2014-12-08
For about three years I have been working on a custom BLDC motor controller (also known as an ESC). I have spent hundreds of hours on writing code and I have made many minor and four major revisions of the printed circuit board (PCB). Now I finally have something that I can publish. The code can still be cleaned up a lot, especially the latest parts that I wrote in a hurry, but I don’t want to delay the release forever.
The features of this BLDC controller are:
- The hardware and software is open source.
- A STM32F4 microcontroller.
- A DRV8302 MOSFET driver / buck converter / current shunt amplifier.
- IRFS3006 MOEFETs.
- 5V 1A output for external electronics from the buck converter integrated on the DRV8302.
- Voltage: 8V – 60V.
- Current: Up to 240A for a couple of seconds or about 50A continuous depending on the cooling.
- PCB size: slightly less than 40mm x 60mm.
- Current and voltage measurement on all phases.
- Regenerative braking.
- Sensored or sensorless commutation.
- Adaptive PWM frequency to get as good ADC measurements as possible.
- RPM-based phase advance.
- Good start-up torque in the sensorless mode (and obviously in the sensored mode as well).
- The motor is used as a tachometer, which is good for odometry on modified RC cars.
- Duty-cycle control, speed control or current control.
- Seamless 4-quadrant operation.
- Interface to control the motor: servo signal, analog, UART, I2C, USB or CAN (with a transceiver). Some of these modes need a bit more code to work, but not much.
- Servo signal output. Good when e.g. controlling an RC car from a raspberry pi or an android device.
- The USB port uses the modem profile, so an Android device can be connected to the motor controller without rooting. Because of the servo output, the odometry and the extra ADC inputs (that can be used for sensors), this is perfect for modifying a RC car to be controlled from Android (or raspberry pi).
- Adjustable protection against
- Low input voltage
- High input voltage
- High motor current
- High input current
- High regenerative braking current (separate limits for the motor and the input)
- Rapid duty cycle changes (ramping)
- High RPM (separate limits for each direction).
- When the current limits are hit, a soft back-off strategy is used while the motor keeps running.
- The RPM limit also has a soft back-off strategy.
- The commutation works perfectly even when the speed of the motor changes rapidly. This is due to the fact that the magnetic flux is integrated after the zero crossing instead of adding a delay based on the previous speed.
- When the motor is rotating while the controller is off, the commutations and the direction are tracked. The duty-cycle to get the same speed is also calculated. This is to get a smooth start when the motor is already spinning.
- All of the hardware is ready for sensorless field-oriented control (FOC). Writing the software is the remaining part.
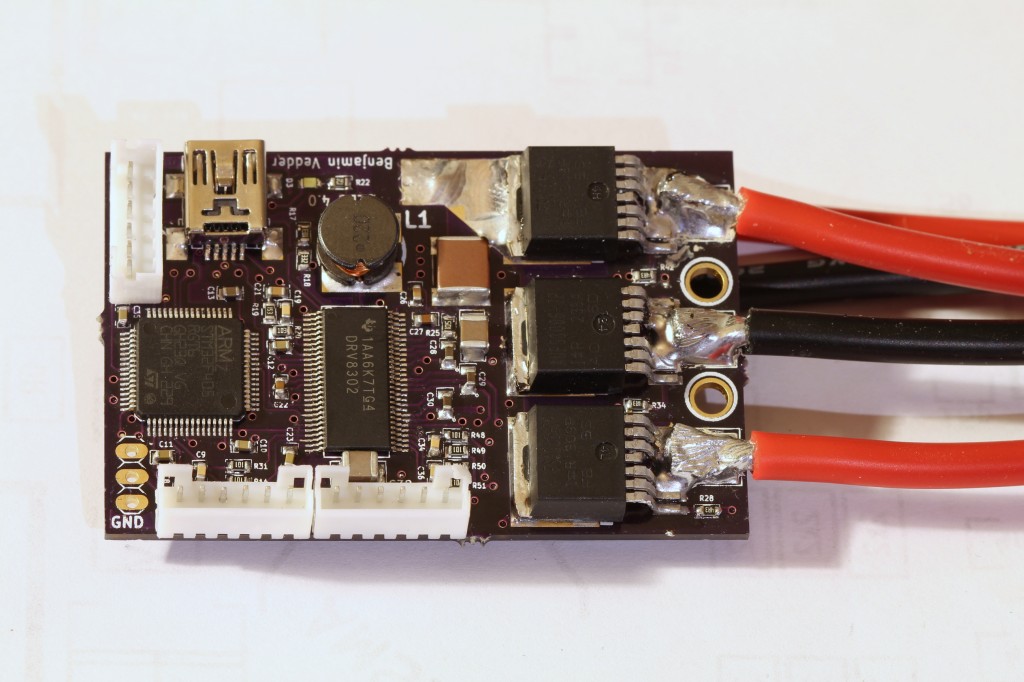
This is a photo of the front of the assembled PCB (please ignore the soldering quality…):

